
 Bookmark
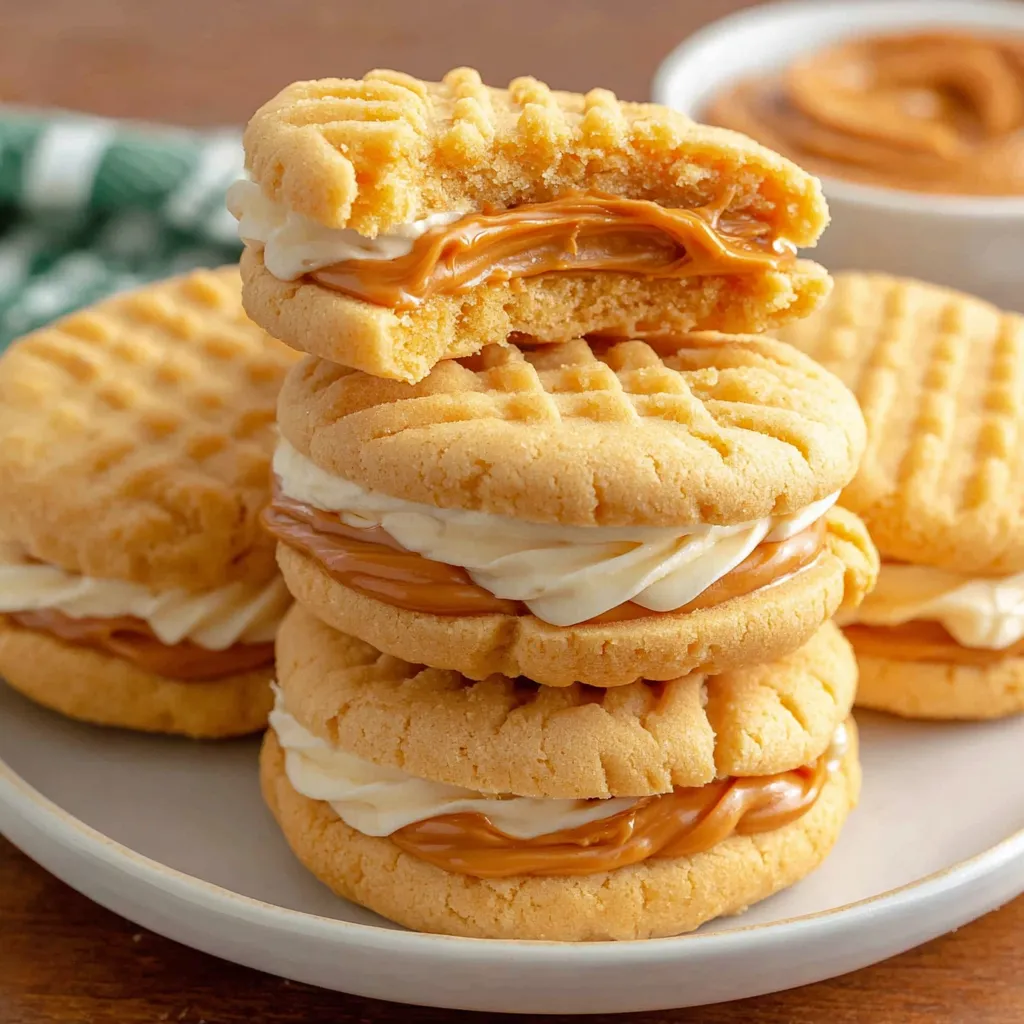
This peanut-shaped sandwich cookie brings back childhood memories with a homemade twist that tastes even better than the original. The combination of soft, chewy peanut butter cookies with creamy peanut butter filling creates an irresistible treat that perfectly balances sweet and salty flavors.
I first made these for my nephew's birthday party as an alternative to cake. They disappeared so quickly that I now double the batch whenever I make them for family gatherings.
Ingredients
- Unsalted butter creates a tender cookie texture and lets the peanut flavor shine
- Creamy peanut butter provides that classic nutty flavor in both cookie and filling
- Brown sugar adds moisture and a subtle molasses note that enhances the peanut butter
- Vanilla extract brings warmth and depth to both cookie and filling
- All purpose flour provides structure while maintaining softness
- Powdered sugar creates a smooth filling without any graininess
Step-by-Step Instructions
- Prepare the Oven and Ingredients
- Preheat your oven to 350°F and line baking sheets with parchment paper. Make sure your butter has softened at room temperature for about 30 minutes so it creams properly with the sugars.
- Create the Cookie Base
- Beat butter and peanut butter together until completely smooth before adding both sugars. Continue mixing for a full 3 minutes until the mixture becomes noticeably lighter in color and fluffier in texture. This incorporates air for a tender cookie.
- Add Wet Ingredients
- Mix in the egg and vanilla extract until fully incorporated. The mixture should look smooth and glossy. Be careful not to overmix after adding the egg as this can toughen the cookies.
- Incorporate Dry Ingredients
- Whisk your flour, baking soda, and salt separately to ensure even distribution of leavening. Add to the wet ingredients in two additions, mixing just until no dry streaks remain. The dough should be soft but not sticky.
- Shape and Prepare for Baking
- Roll dough into 1 inch balls then gently shape into ovals to mimic the classic peanut shape. Press with a fork in a crosshatch pattern and sprinkle with a little extra sugar for sparkle and crunch.
- Bake to Perfection
- Watch the cookies carefully as they bake for 8 to 10 minutes. They should be just barely golden at the edges but still soft in the center. They will continue to set as they cool on the baking sheet.
- Create the Filling
- Beat room temperature peanut butter and butter together until extremely smooth before adding powdered sugar and vanilla. Add milk gradually until you reach a consistency that holds its shape but spreads easily.
- Assemble the Sandwich Cookies
- Ensure cookies are completely cool before assembling. Match cookies of similar sizes together, then add about 1 tablespoon of filling to the flat side of one cookie and press another cookie on top gently to create a sandwich.
 Bookmark
My absolute favorite part of making these cookies is watching people take their first bite. That moment of nostalgic recognition followed by surprise at how much better they taste than the packaged version makes all the effort worthwhile.
Storage Tips
These cookie sandwiches maintain their perfect texture at room temperature in an airtight container for up to 3 days. For longer storage, refrigerate them for up to a week, but allow them to come to room temperature before serving for the best texture and flavor. You can also freeze the assembled cookies for up to 3 months wrapped individually in plastic wrap and stored in a freezer container.
Customization Options
Feel free to experiment with different textures and flavors. Try chunky peanut butter for added crunch, or mix mini chocolate chips into the filling for a chocolate peanut butter version. For a holiday twist, roll the edges of the filled cookies in festive sprinkles or finely chopped peanuts for extra texture and visual appeal.
Serving Suggestions
These homemade Nutter Butters make an excellent accompaniment to cold milk or hot coffee. For an elevated dessert, crush the cookies and layer them with vanilla ice cream and chocolate sauce to create a peanut butter parfait. They also make wonderful ice cream sandwiches when filled with vanilla or chocolate ice cream instead of the peanut butter filling.
The History Behind the Cookie
The original Nutter Butter cookies were introduced by Nabisco in 1969 and quickly became an American classic. Their distinctive peanut shape was revolutionary at the time, and the cookies have maintained their popularity for over five decades. This homemade version honors that legacy while allowing you to control the ingredients and customize the flavors to your preference.
Recipe Q&A
- → How should I store these peanut butter sandwich cookies?
Store the assembled cookies in an airtight container at room temperature for up to 3 days. For longer freshness, refrigerate them. Just be sure to let the cookies cool completely before assembling to prevent the filling from melting.
- → Can I use natural peanut butter for this recipe?
Yes, you can use natural peanut butter for a less sweet, more intense peanut flavor. However, be aware that the texture of the dough may be slightly different, and you might need to adjust the sugar levels to compensate for the reduced sweetness in natural peanut butter.
- → How can I adjust the filling consistency?
The filling consistency can be easily adjusted by controlling the amount of milk you add. Start with one tablespoon and add more gradually until you reach your desired consistency. For a stiffer filling that's better for piping decorative patterns, use less milk. For a creamier, more spreadable filling, add a bit more.
- → Can I freeze these peanut butter sandwich cookies?
Yes, these cookies freeze well! You can freeze them either assembled or as separate components. For assembled cookies, place them in a single layer in an airtight container with parchment between layers. Thaw at room temperature before serving. You can also freeze the unfilled cookies and make the filling fresh when ready to serve.
- → How do I get the classic peanut shape?
To create the classic peanut shape, roll the dough into small balls (about 1 inch), then gently shape them into ovals by pressing the sides. Create the traditional crosshatch pattern by pressing a fork into the top of each oval, then rotating the fork 90 degrees and pressing again to create perpendicular lines.
- → Can I make these cookies ahead of time for an event?
Absolutely! You can make the cookie portions up to 3-4 days in advance and store them in an airtight container. Prepare the filling a day before your event, then assemble the cookies a few hours before serving for the freshest taste and texture.