
 Bookmark
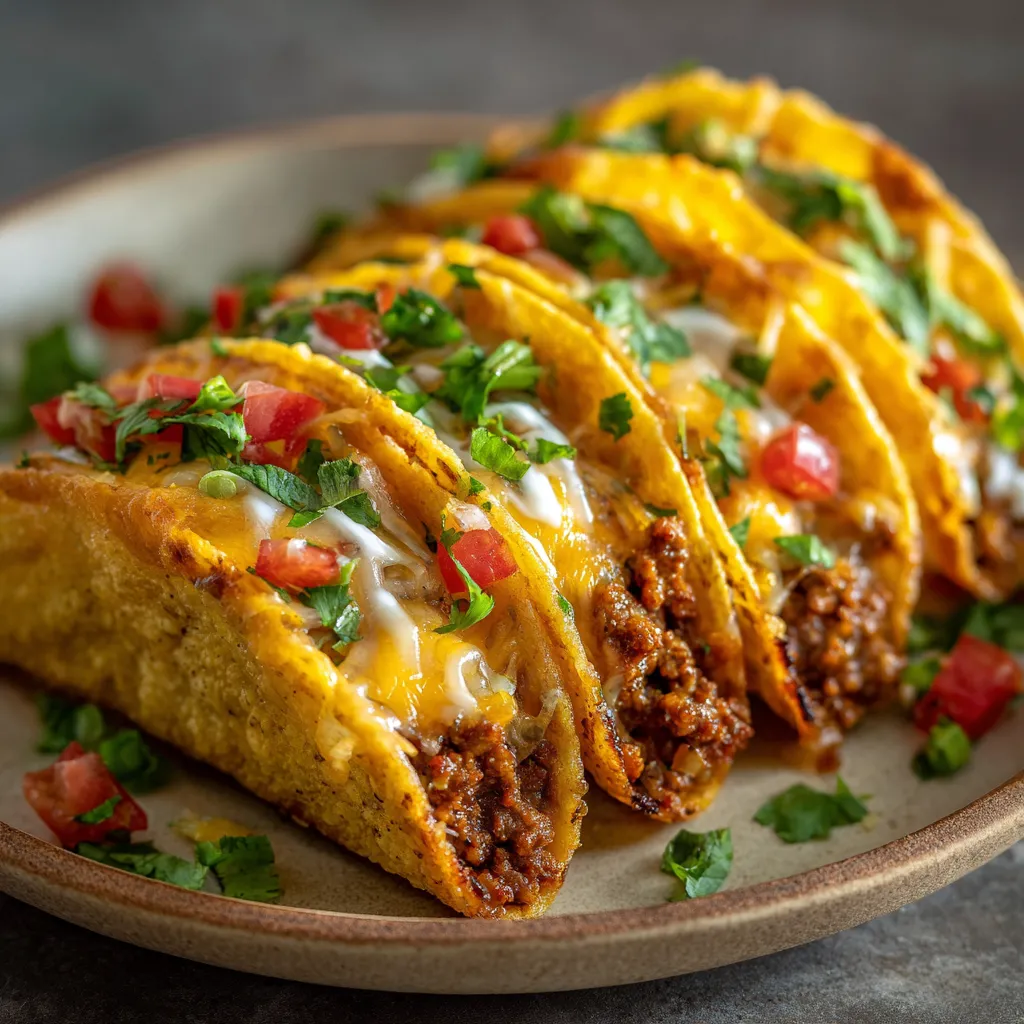
This crispy oven-baked taco recipe transforms traditional tacos into a cheesy, melty delight that satisfies the whole family. By baking the filled tacos, the shells become perfectly crisp while the cheese melts beautifully over the seasoned beef.
I discovered this technique when hosting a taco night that got delayed by an hour. Instead of serving soggy tacos, I popped the filled shells in the oven and accidentally created our new favorite dinner tradition. My kids now specifically request "oven tacos" instead of regular tacos every time.
Ingredients
- Ground beef creates the hearty base for these tacos. Look for 85/15 lean to fat ratio for best flavor without excess grease.
- Onion and garlic provide aromatic flavor foundation. Fresh is best but dried works in a pinch.
- Taco seasoning brings authentic Mexican flavors. Store bought works great but homemade allows you to control salt and spice levels.
- Tomato sauce adds moisture and helps the seasonings coat the meat evenly. Use regular or fire roasted for extra flavor.
- Hard taco shells are essential. Choose quality brands that feel sturdy as they need to withstand filling and baking.
- Shredded cheese melts perfectly over the meat. A Mexican blend offers the best flavor profile and meltability.
- Fresh toppings like lettuce, tomatoes, onions and cilantro add brightness, crunch and color to contrast with the rich filling.
- Optional garnishes like sour cream, guacamole and hot sauce let everyone customize to their taste preferences.
Step-by-Step Instructions
- Preheating and Preparation
- Turn your oven to 400°F and find a baking dish where your taco shells can stand upright without falling over. The shells need to remain open during baking to allow the cheese to melt properly. If you have a specialized taco baking rack, even better, but a regular 9x13 dish works fine.
- Meat Mixture Magic
- Cook your ground beef and diced onion in a large skillet over medium heat for about 7 minutes until no pink remains. Use a wooden spoon to break up the meat into small, even crumbles as it cooks. Drain off excess fat to prevent greasy tacos. Add the minced garlic and taco seasoning, stirring constantly for 1 minute to toast the spices and develop their flavors. The mixture should become fragrant. Pour in the tomato sauce, stirring to incorporate, then reduce heat and simmer for 5 minutes until slightly thickened. This simmering step is crucial for flavor development.
- Strategic Assembly
- Stand your taco shells upright in your baking dish, then fill each shell about 2/3 full with the meat mixture. Avoid overfilling as the meat will expand slightly when baked. Distribute the filling evenly between all shells. Generously sprinkle shredded cheese on top of the meat in each shell, making sure the cheese reaches all the way to the edges for that perfect melty coverage.
- Baking to Perfection
- Place your filled taco shells in the preheated oven and bake for 10 to 15 minutes. Watch carefully after 10 minutes as ovens vary. The cheese should be completely melted and starting to bubble, and the edges of the taco shells should turn a deeper golden brown. This baking process not only melts the cheese but also crisps the shells and helps the flavors meld together.
- Finishing Touches
- Remove the baking dish from the oven and let the tacos cool for just 1 to 2 minutes before adding the cold toppings. Add fresh lettuce, diced tomatoes, red onion and cilantro as desired. Serve immediately with small bowls of sour cream, guacamole, and hot sauce on the side for guests to add according to their preferences.
 Bookmark
The humble taco shell is truly the unsung hero of this recipe. I once tried making these with soft tortillas folded and propped up, and while tasty, they missed that distinctive crunch that makes this recipe special. My family has a running joke about the time I accidentally bought mint instead of cilantro. Despite my horror, my youngest declared the mint tacos "weirdly awesome" and now occasionally requests the mistake version.
Make-Ahead Options
These tacos work wonderfully for meal prep scenarios. You can prepare the meat mixture up to three days in advance and store it in an airtight container in the refrigerator. When ready to serve, simply reheat the meat, assemble in the shells with cheese, and bake as directed. This approach saves precious time on busy weeknights without sacrificing quality or flavor.
Clever Substitutions
Ground beef can be swapped for ground chicken, turkey, or even plant based crumbles. Each brings a different flavor profile but works equally well with the seasonings. For a vegetarian version, try using a mixture of black beans and diced mushrooms sautéed with the same spices. The key is ensuring whatever substitute you use isnt too wet, as excess moisture can make the shells soggy during baking.
Serving Suggestions
Transform these tacos into a complete fiesta by serving alongside Mexican rice and refried beans. For a lighter option, a simple side salad with lime vinaigrette complements the rich tacos perfectly. Set up a toppings bar with different salsas, pickled jalapeños, various cheeses, and hot sauces to let guests customize their experience. This interactive element makes these tacos perfect for casual entertaining.
Bookmark
Recipe Q&A
- → Can I use ground turkey instead of beef?
Yes! Ground turkey works excellently as a leaner alternative. Cook it exactly the same way, though you might want to add a tablespoon of olive oil when browning since turkey has less natural fat than beef.
- → How do I keep the taco shells from falling over?
If your taco shells won't stand upright in your baking dish, try creating a makeshift rack by scrunching aluminum foil into long tubes and placing them between shells. Some people also use the spaces in a muffin tin to hold shells upright.
- → Can these be made ahead of time?
You can prepare the meat filling up to 2 days ahead. For best results, assemble and bake the tacos just before serving. If needed, you can fully assemble and bake them, then reheat at 350°F for about 5 minutes, adding fresh toppings after reheating.
- → Are these gluten-free?
Yes, these can be gluten-free if you use corn taco shells and verify your taco seasoning is gluten-free. Some packaged seasonings contain wheat-based fillers, so check labels or make your own blend.
- → What's the best cheese to use?
A Mexican blend offers great flavor and melt, but cheddar, Monterey Jack, or pepper jack all work wonderfully. For authentic flavor, try using Oaxaca or queso asadero if you can find them.
- → Can I make these vegetarian?
Absolutely! Replace the ground beef with plant-based meat substitute, crumbled tofu, or a bean mixture (black beans and pinto beans mashed with taco seasoning makes a fantastic filling).