
 Bookmark
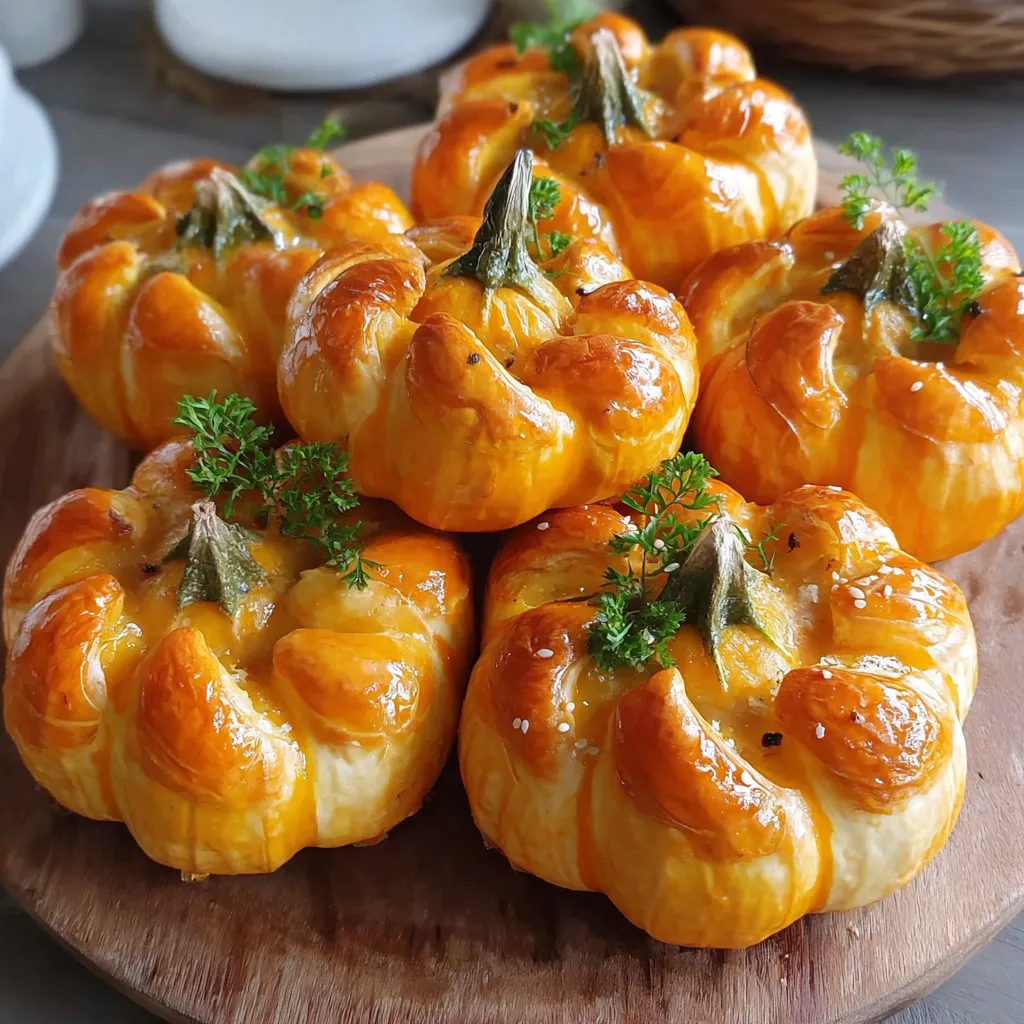
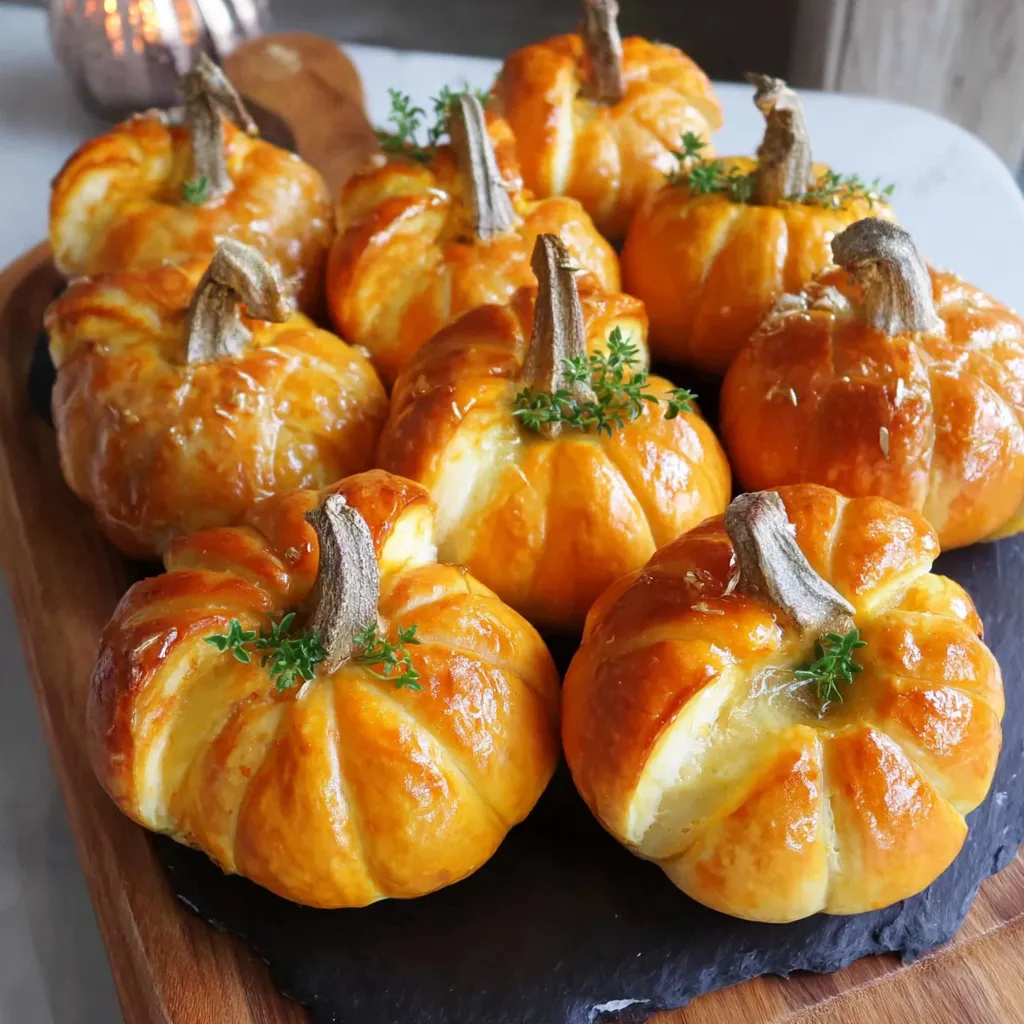
This crescent pumpkin recipe transforms simple store-bought dough into adorable fall treats with a creamy center that will impress at any autumn gathering. The combination of flaky pastry, cream cheese, and spiced pumpkin creates the perfect balance of textures and flavors that capture the essence of the season.
I first made these for my daughter's fall school event, and the tray emptied within minutes. Now they're requested at every autumn gathering, and even my pumpkin-skeptical friends can't resist them.
Ingredients
- Refrigerated crescent rolls the flaky texture creates the perfect pastry exterior
- Cream cheese adds a rich tanginess that balances the sweet pumpkin filling
- Pumpkin puree use canned for consistency, but make sure it's pure pumpkin not pumpkin pie filling
- Warm spices including cinnamon, ginger, nutmeg and allspice for that authentic fall flavor
- Kitchen twine creates the distinctive pumpkin ridges without any special baking tools
- Pretzel sticks the perfect edible stem that adds a salty crunch
Step-by-Step Instructions
- Drain the Pumpkin
- Place pumpkin puree between layers of paper towels and gently press to remove excess moisture. This crucial step prevents soggy dough and ensures your pumpkins hold their shape during baking.
- Preheat and Prep
- Set your oven to 375°F and line a baking sheet with parchment paper for easy cleanup. The parchment prevents sticking and helps the bottoms bake evenly.
- Mix Pumpkin Filling
- Combine drained pumpkin with sugars, cornstarch, egg yolk and spices until perfectly smooth. The cornstarch acts as a thickener while the blend of spices creates that classic pumpkin pie flavor profile.
- Prepare Cream Cheese
- Blend softened cream cheese with sugar and vanilla until completely smooth. Room temperature cream cheese is essential for a lump free filling.
- Shape the Dough
- Unroll crescent dough and seal perforations to create rectangles, then cut into squares. Working with cold dough makes handling easier, so keep refrigerated until ready to use.
- Fill and Form
- Place cream cheese and pumpkin filling in the center of each dough square, then gather corners and pinch firmly to seal. Ensure no gaps remain to prevent filling from leaking during baking.
- Create Pumpkin Shape
- Wrap kitchen twine around each filled dough ball, creating eight equal segments. Press gently but firmly enough to create indentations without cutting through the dough.
- Bake to Golden Perfection
- Brush with melted butter for a golden, shiny finish, then bake until puffed and beautifully browned. The butter enhances flavor and creates that irresistible pastry sheen.
 Bookmark
The first time I made these, I skipped draining the pumpkin and ended up with soggy bottoms. That extra step of removing moisture makes all the difference in achieving a perfectly crisp pastry that holds its shape when you bite into it.
Make Ahead Options
These adorable pumpkins work beautifully for meal planning. You can prepare both fillings up to two days in advance and store them separately in airtight containers in the refrigerator. The assembled but unbaked pumpkins can be refrigerated for up to 4 hours before baking, making them perfect for preparing before guests arrive. Just remember to bring them to room temperature for about 10 minutes before baking for the best results.
Creative Variations
While the classic recipe is delicious, you can customize these pumpkins in many ways. Try adding a tablespoon of maple syrup to the pumpkin filling for deeper flavor, or incorporate mini chocolate chips into the cream cheese mixture for a sweeter treat. For a savory version, omit the sugars and add herbs and grated parmesan to the cream cheese, filling with butternut squash instead of pumpkin pie filling.
Serving Suggestions
These pumpkins are versatile enough for multiple occasions. Serve them slightly warm with a scoop of vanilla ice cream for an elevated dessert, or arrange them on a platter surrounded by autumn leaves and cinnamon sticks for a stunning centerpiece at your fall gathering. They pair wonderfully with hot apple cider or pumpkin spice lattes for an afternoon treat that embraces all the cozy flavors of the season.
Troubleshooting Tips
If your dough feels too sticky when working with it, refrigerate it for 10 minutes before continuing. Should any filling leak during baking, simply trim away any excess once cooled. For best results when removing the twine, wait until the pumpkins are just warm, not hot, to prevent tearing the soft dough.
Recipe Q&A
- → Can I make these crescent pumpkins ahead of time?
Yes! You can prepare both the cream cheese and pumpkin fillings up to 2 days ahead and store them in the refrigerator. For best results, assemble and bake the pumpkins the day you plan to serve them to maintain the flaky texture of the crescent dough.
- → Why is draining the pumpkin puree important?
Draining excess moisture from the pumpkin puree is crucial to prevent soggy dough. Too much moisture can make the crescents wet inside and prevent proper baking. Simply place the puree on paper towels and gently press to remove excess liquid before mixing with other ingredients.
- → What can I use instead of kitchen twine?
If you don't have kitchen twine, you can create the pumpkin segments by gently scoring the dough with a butter knife before baking. The lines will remain visible after baking, giving the appearance of pumpkin segments without requiring string removal.
- → Can I freeze these pumpkin crescents?
Yes, these treats freeze well. Allow them to cool completely, then place in an airtight container and freeze for up to 1 month. Thaw at room temperature for about 30 minutes before serving, or warm briefly in a 300°F oven for 5-7 minutes to restore their flaky texture.
- → What alternatives to pretzel sticks can I use for the stems?
Great alternatives for the stems include pecan halves, cinnamon sticks, or small pieces of Tootsie Rolls. You could even use small pieces of green licorice twisted together to mimic pumpkin stems with vines for added decoration.
- → How do I prevent the filling from leaking during baking?
Make sure to fully seal the dough by firmly pinching all edges together after adding the fillings. Place the pumpkins seam-side down on the baking sheet, and don't overfill them - about 1 tablespoon of each filling is the perfect amount for standard crescent roll dough squares.