
 Bookmark
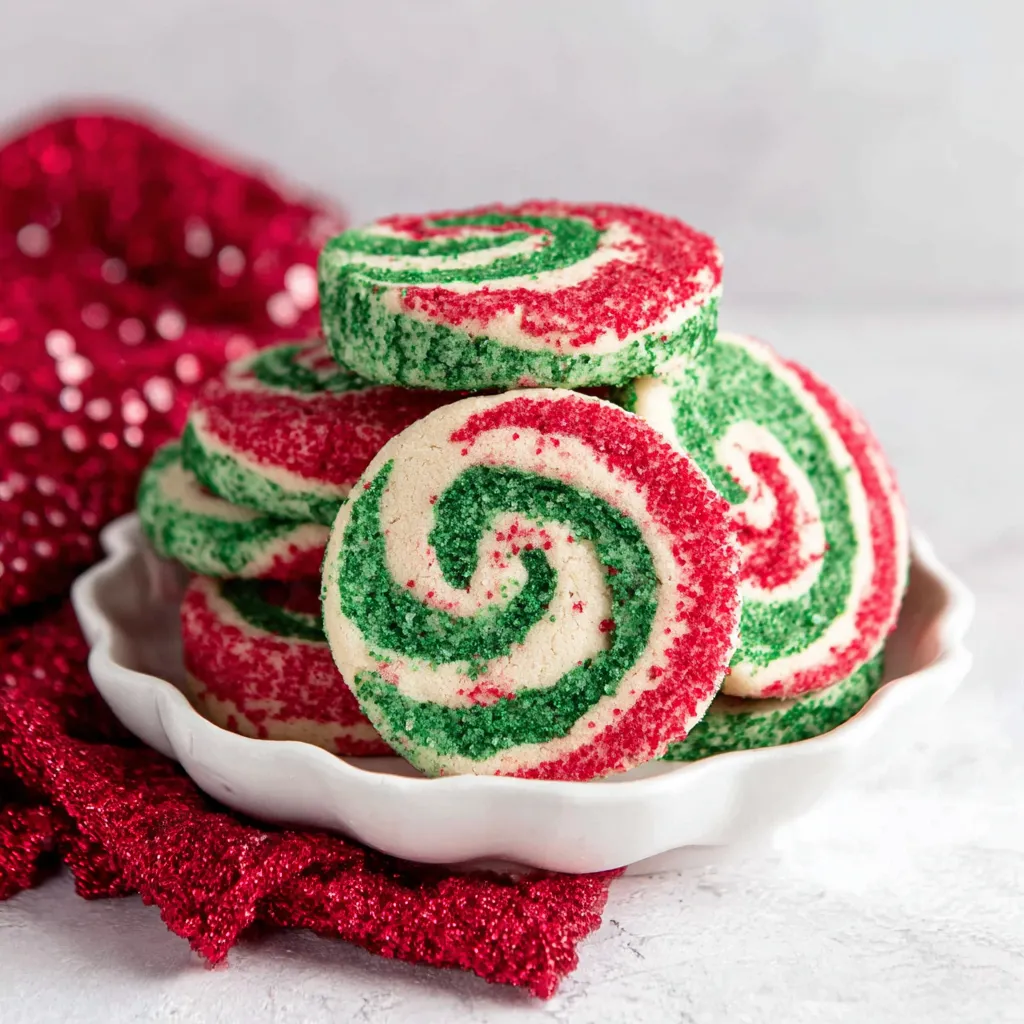
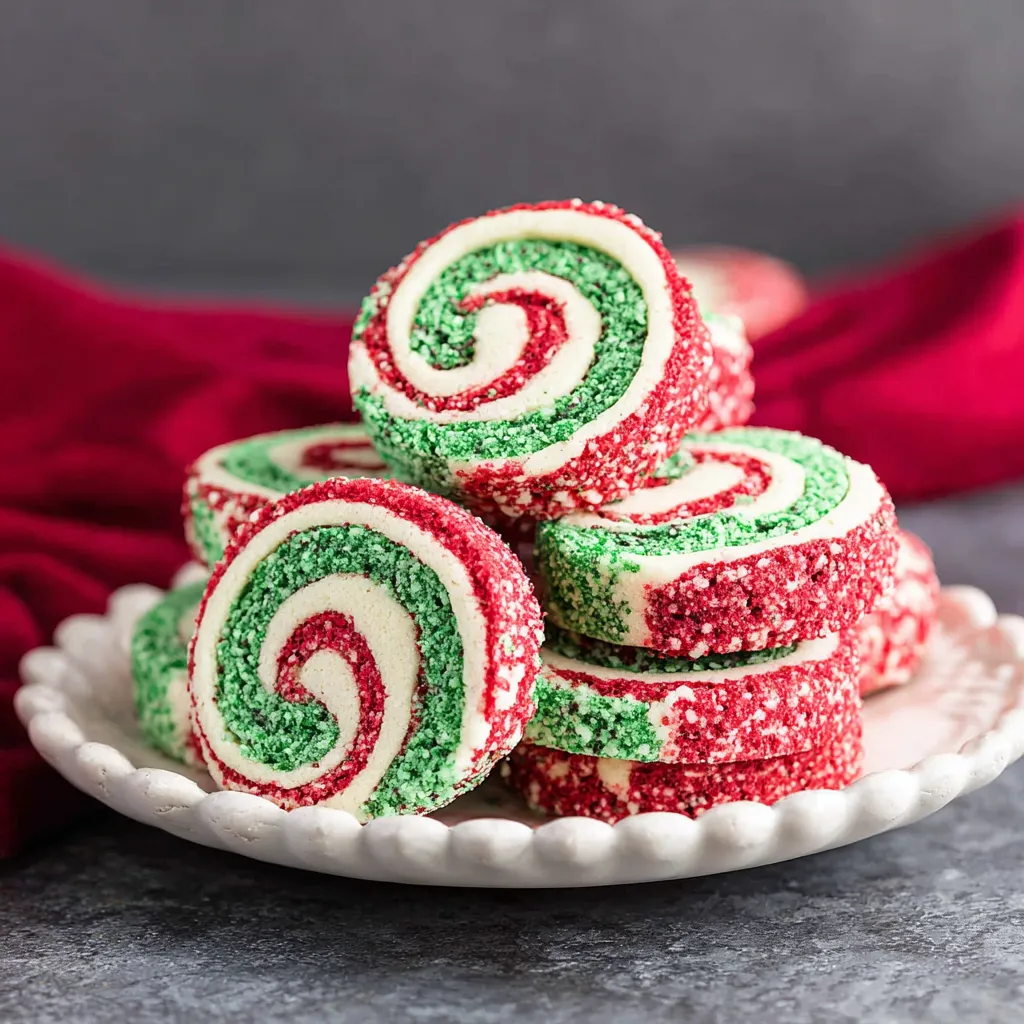
This festive Christmas Pinwheel Cookie recipe creates the most eye-catching holiday treats with mesmerizing red, white, and green swirls rolled in colorful nonpareils. They have become a staple at our family gatherings and cookie exchanges, never failing to impress guests with their cheerful appearance and delicious taste.
I started making these cookies when my children were little, and they would always fight over who got to roll the dough logs in the sprinkles. Now it's become our favorite December tradition to make these together while listening to Christmas music.
Ingredients
- Butter provides richness and helps create that perfect cookie texture. Make sure it's properly softened for easy mixing
- Granulated sugar and powdered sugar work together for the ideal sweetness and structure. The combination gives these cookies their melt in your mouth quality
- Eggs bind everything together and provide structure. Room temperature eggs incorporate more easily
- Vanilla extract adds that classic flavor foundation. Use pure vanilla for the best taste
- All purpose flour is the backbone of our cookie. Measure accurately by spooning into measuring cups and leveling off
- Baking powder gives a slight lift to keep cookies from being too dense
- Salt balances the sweetness and enhances all other flavors
- Gel food coloring creates vibrant colors without thinning the dough. Liquid food coloring can alter the consistency
- Nonpareil sprinkles add festive crunch and visual appeal. Choose holiday colors for maximum impact
Step-by-Step Instructions
- Cream the Butter and Sugars
- Beat the softened butter with both granulated and powdered sugars until the mixture becomes noticeably lighter in color and fluffy in texture. This typically takes about 3 minutes on medium speed in a stand mixer. This step incorporates air into the dough for better texture.
- Add Wet Ingredients
- Mix in eggs one at a time, ensuring each is fully incorporated before adding the next. Add vanilla and any optional flavoring extracts at this stage. Scrape down the bowl thoroughly to ensure even mixing. The mixture may look slightly curdled which is completely normal.
- Combine Dry Ingredients
- Gradually add flour, baking powder, and salt to the wet ingredients, mixing just until no dry streaks remain. Overmixing at this stage can develop too much gluten, resulting in tough cookies. The dough should be soft but not sticky.
- Color the Dough
- Divide dough into three equal portions. Leave one portion white. Add red gel coloring to the second portion and green to the third, mixing each thoroughly until the color is completely uniform. Start with a few drops and add more as needed to achieve bright, vibrant colors.
- Chill the Dough
- Form each colored dough into a disc, wrap in plastic, and chill as directed. This critical step firms up the dough, making it easier to roll out and prevents spreading during baking. The dough should feel firm but pliable when ready.
- Create the Layers
- Roll each disc into a same sized rectangle on parchment paper. Aim for about 1/8 inch thickness. Stack all three colors with white in the middle. Trim the long edges for a clean finish. Press layers gently together to help them adhere.
- Form the Log
- Roll the stacked dough into a tight cylinder, using the parchment paper to guide and support the roll. Apply even pressure across the length to prevent air gaps between layers. Wrap tightly and chill thoroughly until very firm.
- Add Sprinkles
- Roll the chilled log in nonpareil sprinkles, pressing firmly to adhere them to the surface. The slight stickiness of the cold dough will help the sprinkles stick. Rotate the log to ensure even coverage on all sides.
- Slice and Bake
- Cut the log into 1/4 inch slices using a sharp knife. Place slices on parchment lined baking sheets about 2 inches apart. Bake until set but not browned for the brightest colors. The edges should be just barely golden.
 Bookmark
The gel food coloring is truly the secret weapon in this recipe. I discovered after many attempts that liquid coloring simply doesn't create that vibrant holiday hue we all want in a Christmas cookie. My grandmother used to make a version of these without the sprinkles, but adding that extra crunch and sparkle really takes these to a whole new level of festive charm.
Storage Tips
These pinwheel cookies stay fresh in an airtight container at room temperature for up to one week. For longer storage, place them in a single layer in a freezer safe container with parchment between layers and freeze for up to three months. The unbaked dough logs actually freeze beautifully too. Just wrap them tightly in plastic wrap, then aluminum foil, and freeze for up to three months. When ready to bake, thaw in the refrigerator overnight before slicing and baking.
Flavor Variations
While vanilla is the classic flavor for these cookies, you can easily customize them to create different taste experiences. Try adding 1/2 teaspoon of peppermint extract for a refreshing candy cane inspired cookie. Almond extract pairs beautifully with the vanilla base and gives a sophisticated flavor profile. For a citrusy twist, add fresh lemon or orange zest to the dough. You could even replace the vanilla with maple extract for a unique winter flavor. Each variation maintains the beautiful swirl effect while offering a new taste dimension.
Make Ahead Tips
These cookies are perfect for busy holiday baking schedules. The dough can be made up to 3 days in advance and kept refrigerated before slicing and baking. You can also complete all steps up to rolling the dough into logs and adding sprinkles, then refrigerate for up to a week or freeze for up to 3 months. Having these prepped dough logs on hand means fresh baked cookies are just minutes away when unexpected guests arrive or when you need a last minute gift for a holiday gathering.
Recipe Q&A
- → Can I make the dough ahead of time?
Yes! The rolled dough logs can be stored in the refrigerator for up to 1 week before slicing and baking. You can also freeze the logs for up to 3 months - just thaw in the refrigerator overnight before slicing.
- → Why do my cookies crack when rolling the dough?
Cracking usually happens if the dough is too cold or dry. Let it warm slightly at room temperature if it's cracking. Using the parchment paper to help lift and roll the dough (as mentioned in the instructions) also helps prevent cracks.
- → Can I use different colors for these cookies?
Absolutely! While red and green are traditional for Christmas, you can customize the colors for any holiday or occasion. Just be sure to use gel food coloring for the most vibrant results without adding too much liquid to the dough.
- → How do I get the nonpareils to stick to the dough?
Press the chilled dough log firmly into the sprinkles on a baking sheet. You may need to roll and press several times to get good coverage. The slight moisture on the outside of the chilled dough helps the sprinkles adhere.
- → Why do I need to chill the dough?
Chilling is essential for these cookies! It firms up the butter, making the dough easier to handle when rolling, layering, and slicing. It also helps the cookies maintain their round shape and distinct swirl pattern during baking.
- → What other flavors can I add to these cookies?
While vanilla is traditional, you can experiment with different extracts like almond, peppermint, or citrus. The recipe mentions optional additional flavorings (1/2-1 teaspoon) or lemon zest which can be added when mixing in the eggs and vanilla.