
 Bookmark
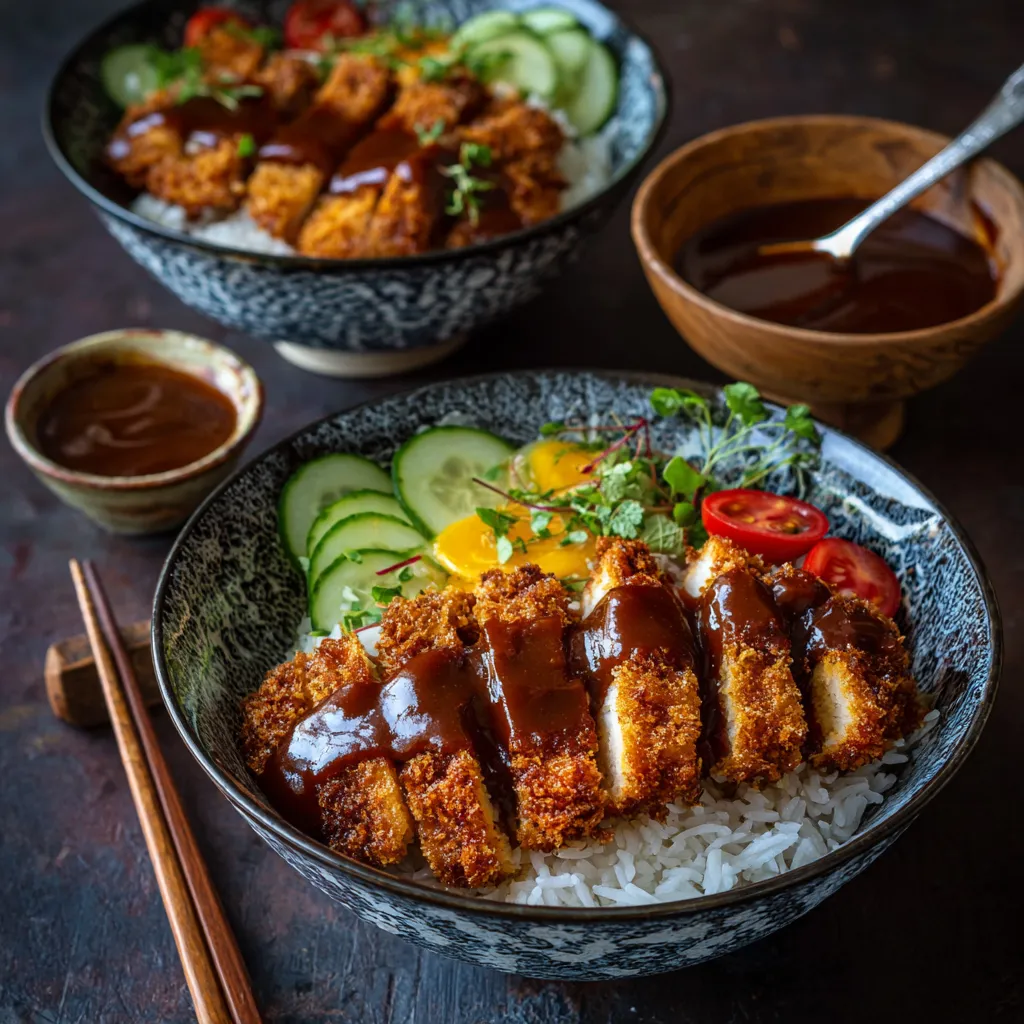
This crispy katsu rice bowl recipe transforms ordinary chicken or pork into a golden-fried Japanese comfort food classic that sits atop fluffy rice and gets drizzled with a sweet-savory tonkatsu sauce. The contrast between the crunchy exterior and juicy interior creates a satisfying meal that brings restaurant-quality flavors to your home kitchen.
I first learned to make katsu while living in Japan where it was a staple in casual restaurants. When I returned home and had serious cravings for authentic Japanese food, perfecting this recipe became my mission until my family started requesting it weekly.
Ingredients
- For the Katsu
- Boneless chicken breasts or pork loin cutlets these are the foundation of your dish and should be pounded thin for proper cooking
- Panko breadcrumbs essential for that signature ultra crispy exterior that regular breadcrumbs cannot achieve
- All purpose flour creates the first layer that helps the egg and panko adhere properly
- Large eggs act as the glue that binds everything together
- Salt and pepper simple seasonings that enhance the meat without overpowering
- Vegetable or canola oil neutral oils with high smoke points perfect for achieving that golden crust
- For the Bowl
- Cooked white rice sushi rice offers the perfect slightly sticky texture that pairs wonderfully with katsu
- Fresh parsley or green onions adds a pop of color and freshness to balance the richness
- For Homemade Tonkatsu Sauce
- Ketchup provides sweetness and tomato flavor as the sauce base
- Worcestershire sauce adds complex umami and tanginess
- Soy sauce brings saltiness and depth
- Sugar balances the savory elements with just enough sweetness
Step-by-Step Instructions
- Prepare the Meat
- Pound chicken or pork cutlets to about half inch thickness using a meat mallet or rolling pin. This ensures even cooking and tenderness. Season both sides generously with salt and pepper to build flavor from the beginning.
- Set Up Breading Station
- Arrange three shallow bowls in sequence to create an efficient breading assembly line. Place flour in the first bowl, beaten eggs in the second bowl, and panko breadcrumbs in the third bowl. This organization makes the coating process smooth and less messy.
- Bread the Cutlets
- Take each seasoned cutlet and dredge it thoroughly in the flour, ensuring complete coverage but shaking off any excess. Next, dip into the beaten eggs, allowing any excess to drip off. Finally, press firmly into the panko breadcrumbs, using your fingers to ensure an even, thick coating that will become magnificently crispy.
- Heat the Oil
- Pour vegetable or canola oil into a large frying pan to about half inch depth. Heat over medium high heat until it reaches approximately 350°F. If you dont have a thermometer, test by dropping a few breadcrumbs in the oil. They should sizzle immediately but not burn.
- Fry to Perfection
- Carefully place the breaded cutlets into the hot oil without crowding the pan. Fry chicken for 3 to 4 minutes per side or pork for 2 to 3 minutes until deeply golden brown. The color should be a rich amber, not pale. Transfer to paper towels to absorb excess oil while maintaining crispiness.
- Make the Sauce
- Combine ketchup, Worcestershire sauce, soy sauce, and sugar in a small bowl. Whisk until completely smooth and slightly thickened. Taste and adjust sweetness or saltiness according to your preference. The sauce should have a perfect balance of tangy, sweet and savory notes.
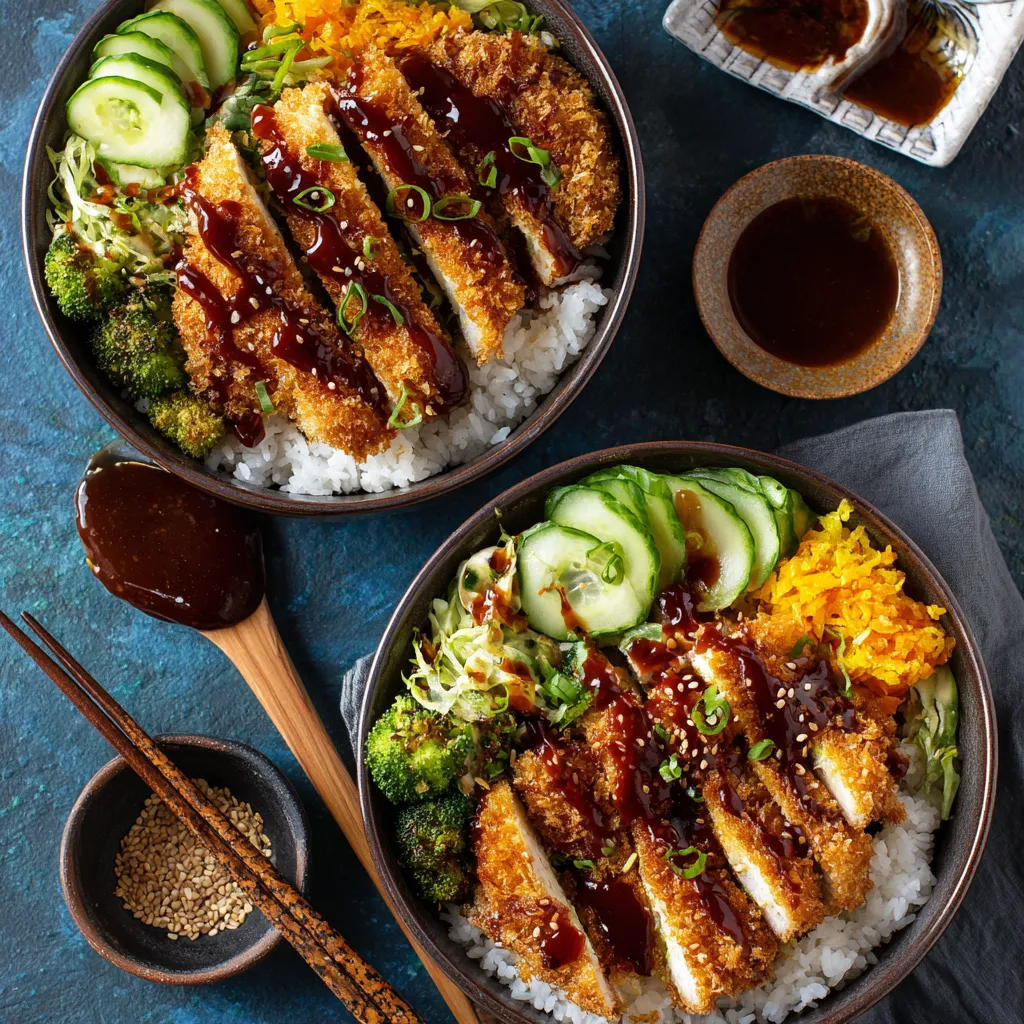
- Assemble the Bowls
- Slice the beautifully fried katsu into strips across the grain for tenderness. Arrange these strips over a generous portion of hot rice. Drizzle the homemade tonkatsu sauce liberally over the katsu. If desired, sprinkle with freshly chopped parsley or green onions for a bright finish.
 Bookmark
My absolute favorite part of this recipe is the moment when you cut into the perfectly fried katsu and hear that distinctive crunch. It reminds me of the tiny restaurant in Tokyo where I first fell in love with this dish. The owner showed me that the secret lies in pressing the panko firmly onto the meat and maintaining the right oil temperature.
The History Behind Katsu
Japanese katsu or tonkatsu originated in the late 19th century when Japan was opening up to Western influences. The dish represents the Japanese adaptation of Western cutlets, transformed through distinctive preparation methods and flavor profiles. While originally considered yoshoku food fusion cuisine, katsu has become thoroughly integrated into everyday Japanese meals. The serving style with shredded cabbage and tonkatsu sauce emerged in the early 20th century and remains the traditional presentation today.
Storage and Reheating
Leftover katsu will maintain its quality in the refrigerator for up to 3 days when stored in an airtight container. For best results, store the katsu, rice, and sauce separately. To reheat, place the katsu on a wire rack over a baking sheet in a 350°F oven for about 10 minutes. This method helps restore the crispy exterior without drying out the meat. Avoid microwaving if possible as it will make the breading soggy. The tonkatsu sauce actually improves in flavor after a day as the ingredients meld together.
Make It Your Own
This recipe welcomes personalization to suit different dietary needs or flavor preferences. For a lighter version, try air frying the breaded cutlets with a light spray of oil. Vegetarians can substitute firm tofu or eggplant slices that have been pressed dry. The sauce can be adjusted with honey instead of sugar or coconut aminos instead of soy sauce for different dietary needs. Adding a teaspoon of grated ginger or garlic to the sauce creates a more complex flavor profile that complements the crispy katsu beautifully.
Serving Suggestions
For an authentic Japanese experience, serve your katsu bowls with sides that complement the main dish. Thinly sliced cabbage dressed with a light vinaigrette provides a refreshing crunch that cuts through the richness of the fried katsu. A simple miso soup makes an excellent starter that prepares the palate. Japanese pickles like fukujinzuke or quick pickled cucumbers add brightness and acidity. For a complete meal, finish with green tea or a small bowl of fresh fruit to cleanse the palate.
Recipe Q&A
- → Can I use different proteins for this katsu?
Absolutely! While chicken and pork are traditional, you can also use turkey cutlets, firm tofu (pressed well to remove moisture), or even thinly sliced eggplant for a vegetarian version. Just adjust cooking times accordingly as these alternatives may cook faster than chicken.
- → How do I know when the oil is the right temperature for frying?
If you don't have a thermometer, drop a few panko breadcrumbs into the oil. If they sizzle immediately and float to the surface, your oil is ready (around 350°F). If they sink or burn quickly, adjust your heat accordingly. Maintaining proper oil temperature is crucial for achieving that perfect crispy exterior.
- → Can I bake or air fry the katsu instead?
Yes! For a lighter version, spray the panko-coated cutlets with cooking oil and bake at 400°F for 20-25 minutes, flipping halfway through. In an air fryer, cook at 375°F for about 12-15 minutes, also flipping halfway. While slightly less crispy than traditional frying, these methods still produce delicious results.
- → What sides pair well with katsu rice bowls?
Traditional accompaniments include thinly sliced cabbage, cucumber sunomono (vinegar salad), miso soup, and Japanese pickles like fukujinzuke. For a complete meal, consider adding steamed edamame or a simple side salad with ginger dressing.
- → How can I store and reheat leftovers?
Store the katsu separate from the rice in airtight containers in the refrigerator for up to 2 days. To reheat, place the katsu in a 350°F oven for 5-10 minutes to restore crispiness. Microwaving will make it soggy. The sauce can be stored separately for up to a week and the rice can be reheated with a sprinkle of water.
- → What's the difference between katsu sauce and tonkatsu sauce?
They're essentially the same thing! Tonkatsu sauce specifically refers to the sauce served with tonkatsu (pork cutlet), while katsu sauce is the general term used for the sauce served with any kind of katsu dish. Both have the same sweet-savory flavor profile based on Worcestershire sauce, ketchup, and soy sauce.